
An easy bike chain is not comfortable to ride with and can also be unsafe. Learning how to tighten a bike chain is a vital skill anyone who uses a bicycle should possess. Well-tensioned chains not only provide a smoother experience but also protect your bike from unnecessary wear.
Regardless of whether you are a beginner or a seasoned cyclist, it is useful to learn how to shift the chain when it is needed.
In this Content, we’ll cover the steps to effectively tighten your bike chain, helping you maintain a safer and more enjoyable cycling experience.
1. Why a Tight Bike Chain Is Important
A properly tensioned bike chain is required for easy pedaling, preventing derailment and prolonging the life of your bike’s drivetrain. An overly loose or tight chain may put undue stress on the bike’s parts, cause them to wear out early, and necessitate more maintenance. Smooth gear shifting in your bike is guaranteed through proper tensioning of the chain, giving you a smooth ride. By keeping the chain at the right tension, you’ll avoid skipping or jerky shifts, improve your overall performance, and extend the life of your bike’s components.
2. Signs Your Bike Chain Needs Tightening
Prior to tightening your bike chain, remember the characteristic signs of chain slack such as skipping gears, poor shifting quality or chain noise. When the chain is loose, you will hear clanking sounds or perceive it slipping when pedaling. In extreme cases, you may experience jarring jerks or difficulty maintaining speed. Another sign is when the bike chain moves too far when you try to pull it away from the gears. Identifying these signs early will prevent your bike’s drivetrain from further wear and tear, giving you a smoother ride.
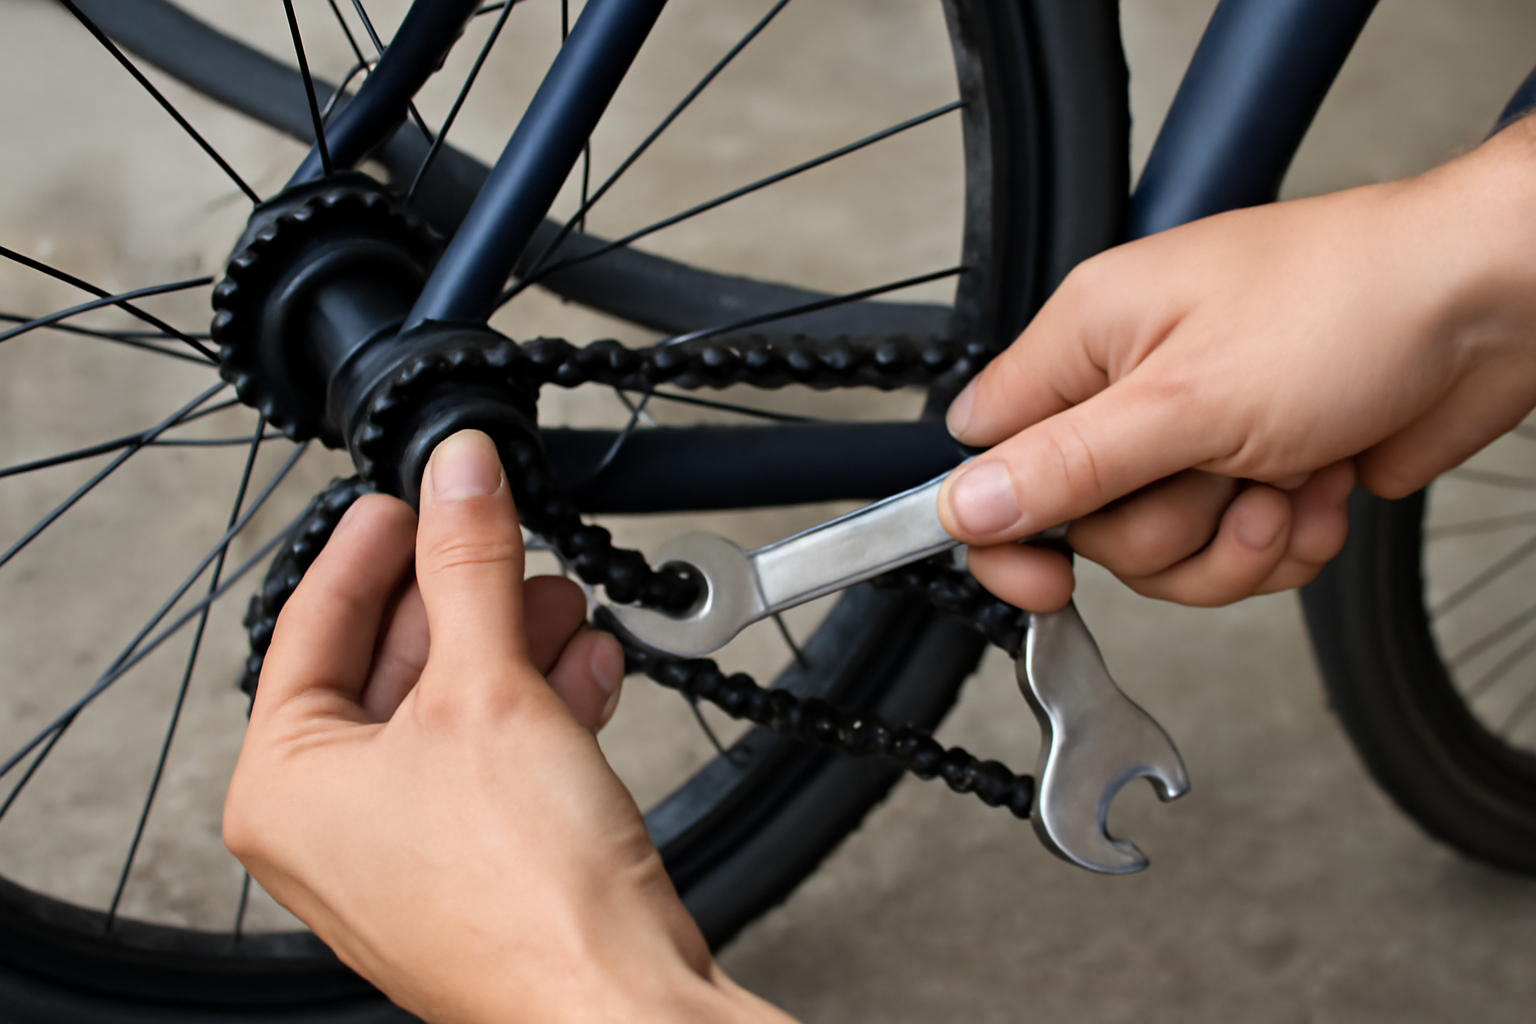
3. Tools You’ll Need to Tighten Your Bike Chain
In order to tighten your bike chain, you will need certain tools like a wrench, chain tool, and possibly a new link if the chain is very stretched out. In order to adjust chain tension, the wrench will be useful for removing the rear wheel nuts. A chain tool is required to remove or install links in case of a too-stretched or damaged chain. Also, a stand for the bike can provide more stability in the process. Having these available will make the work faster and better, with the right tension for peak performance.
4. Step-by-Step Guide on How to Tighten the Bike Chain
Check the steps below to tighten the bike chain: look for slack or misalignment, and To change the chain tension, move the rear wheel forward or backward to loosen it. Tighten the wheel after adjustment and test the chain by pedaling for proper gear shifting.
4.1. Examine the rear derailleur and chain.
Inspection of the rear derailleur: Ensure proper alignment and smooth movement to prevent slack in the chain.
Examination of the derailleur hanger: When bent, it may result in poor chain tension and misalignment.
Inspection of the chain: Check for rust, worn-out links, or fractured parts that can affect chain tension.
Shifting performance test: Ensure that the derailleur shifts smoothly through all gears (if fitted).
4.2. Loosen the Rear Wheel

- Use a wrench: Loosen the bolts on the rear wheel (for bikes with bolts).
- Quick-release lever: If your bike has a quick-release system, open the lever to loosen the wheel.
- Don’t remove the wheel: Just loosen enough to adjust the wheel position without fully detaching it.
- Ensure wheel alignment: Check that the wheel is aligned with the frame before making adjustments.
4.3. Adjust the Chain Tension
- Move the rear wheel backward: If the chain is too loose, slide the wheel back to reduce slack.
- Move the rear wheel forward: If the chain is too tight, shift the wheel forward slightly.
- Test the movement: Rotate the pedals manually to ensure smooth movement without jerks or skipping.
4.4. Tighten the Rear Wheel and Test the Chain
- Tighten the wheel bolts: Securely tighten the rear wheel bolts or quick-release lever after adjusting the chain.
- Align the wheel: Make sure the wheel is properly aligned with the frame before tightening.
- Pedal test: Pedal the bike to check that the chain runs smoothly without skipping or unusual noises.
- Double-check the tightness: Recheck that the wheel bolts are properly tightened to avoid loosening while riding.
5. How to Tighten a Bike Chain on a Single-Speed or Fixie Bike
- Adjust the rear wheel: For single-speed or fixie bikes, you’ll need to move the rear wheel back to tighten the chain and forward to loosen it.
- No derailleur adjustments: Since there’s no derailleur, the chain tension is controlled only by the wheel position.
- Align the chain properly: Ensure that the chain runs straight and smoothly, without any kinks.
- Check for sufficient tension: Make sure there’s enough tension to prevent the chain from slipping but not too tight that it causes resistance.
6. Troubleshooting Common Chain Tightening Issues
Worn-out or old chain: Tightening may not remedy the situation if the chain is old or worn out. Inspect for wear and replace if necessary.
Misaligned rear derailleur: An illegally aligned derailleur can refuse the proper tension in the chain, leading to skipping or slippage.
Misaligned wheel: When the rear wheel is not aligned to the frame, chain tension adjustments will be useless. Align it first before tightening.
Inappropriately tightly or loosely chained: If the chain remains too loose or tight after tightening, re-position the wheel’s position and make sure that it’s in a good alignment.
Check for damaged parts: Check the cogset and chainring for damage that may impact chain tension.
7. How Often Do You Need to Tighten Your Bike Chain?
To keep your bike in prime working order, you need to regularly check and tighten your chain, especially if you do a lot of riding or under harsh conditions. A good rule of thumb is to check your chain every few weeks or after every 200-300 miles of riding, depending on how often you use your bike. If you notice skipping or slackness, address it immediately. Keeping the chain at the correct tension not only prevents discomfort but also prolongs the life of your drivetrain components for an efficient and smooth ride.
Conclusion
Now you know how to tighten a bicycle chain. With it, you can enjoy smoother rides and avoid typical issues like chain slippage or poor shifting.
Keeping the chain of your bicycle at the correct tension ensures better performance, reduced wear on the drivetrain, and better safety in general.
Maintaining your bike on a regular basis will increase its lifespan and make riding more comfortable. This includes checking and tightening the chain. By following the steps outlined, you’ll be able to handle any chain issues with ease, Happy cycling!

I am Ryan Ford, a mountain biking enthusiast who loves to explore the outdoors. I also like to go on adventures with friends and anything else that involves being outside. I love my bike because it gets me out of the house and gives me an opportunity to enjoy nature.