
Are you tired of feeling like you’re reaching for the stars while riding your mountain or specialized bike? Do you dread hitting a bump in the road because it jolts your arms and shoulders?
Fear not, fellow cyclist! You can raise the handlebars on your Specialized bike and enjoy a more comfortable, upright riding position in just a few simple steps.
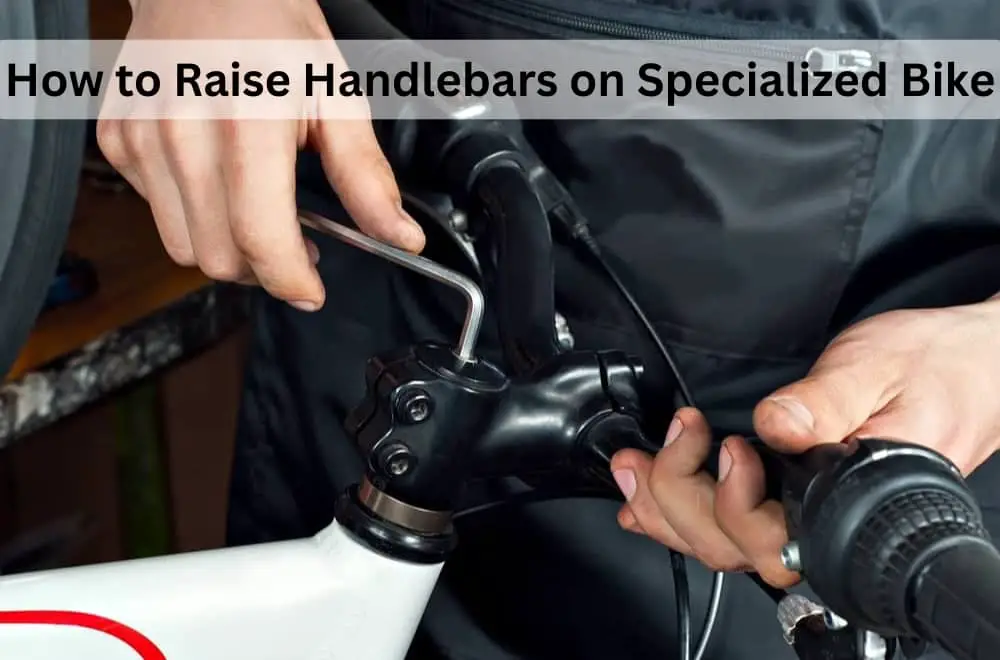
Like a seasoned pro or a casual rider, this guide will walk you through “how to raise handlebars on a specialized bike?”. So sit back (or rather, sit up!), grab your tools, and let’s get started on this handlebar-raising adventure!
When Should You Raise Handlebars on a Specialized Bike?
Raising the handlebars on a Specialized bike can be a simple way to improve comfort and reduce strain on the body during rides. Here are a few situations where it may be beneficial to raise the handlebars:
- Neck or Back Pain: If you experience discomfort in your neck, shoulders, or back during or after riding your Specialized bike, it may be a sign that your handlebars are too low. Raising the handlebars can help you sit more upright, reducing the strain on your upper body.
- Flexibility Issues: If you have limited flexibility in your hips, back, or hamstrings, you may find it challenging to maintain a forward-leaning position on the bike. Raising the handlebars can help you achieve a more comfortable and natural riding position.
- Comfort: If you find the current handlebar position uncomfortable, raising them can help you enjoy your rides more and reduce the risk of developing long-term discomfort or injuries.
- Recreational Riding: Raising the handlebars can make the ride more comfortable and enjoyable if you primarily use your Specialized bike for recreational rides. This is especially true if you are not used to spending long periods on a bike.
Types of Handlebars on Specialized Bikes
Handlebars on Specialized bikes come in various styles, each serving a unique purpose and providing distinct riding experiences.
When you look at Specialized bikes, you’ll notice they offer different types of handlebars. These handlebars aren’t just there for looks; they play a big role in how comfortable and efficient your ride will be. Let’s take a closer look at the various types:
- Flat Handlebars: These are straight handlebars commonly found on mountain bikes and some hybrid bikes. They offer a more upright riding position, which can be comfortable for leisurely rides and off-road adventures.
- Drop Handlebars: Often seen on road bikes, drop handlebars curve downwards and offer multiple hand positions. They’re great for aerodynamics and allow cyclists to adjust their posture for speed and efficiency.
- Riser Handlebars: Similar to flat handlebars but with a slight upward sweep at the ends, riser handlebars provide a more relaxed riding position while still offering some control and stability.
- Bullhorn Handlebars: These handlebars have a unique shape resembling the horns of a bull. They provide various hand positions and are often favored by urban cyclists and bike messengers for their versatility.
- Aero Handlebars: Designed for maximum aerodynamics, aero handlebars are typically found on time trial and triathlon bikes. They allow riders to adopt a more aggressive and streamlined position to minimize wind resistance.
- BMX Handlebars: BMX bikes come with distinctive handlebars that are often wider and taller, providing riders with better control for tricks and jumps.
Each type of handlebar serves a specific purpose, so choosing the right one depends on your riding style, preferences, and intended use of the bike. Whether you’re cruising around town, hitting the trails, or racing on the road, Specialized offers a handlebar style to suit your needs.
How to Raise Handlebars on Specialized Bike?
First, Gather Your Tools
Here are the tools needed for raising the handlebars on a Specialized bike and some tips for choosing the right size wrench and torque setting:
Tools You Need:
- Allen wrench or hex key
- Torque wrench
- Mallet or rubber hammer
- Ruler or measuring tape
- Work stand (optional)
- Grease (optional)
- Steerer tube expander plug (optional)
Tips for choosing the right size wrench:
- Check the user manual for your bike to determine the correct size of Allen wrench or hex key needed.
- Choose a wrench that fits snugly in the bolt head to avoid stripping the bolt or damaging the tool.
- Consider investing in a multi-tool with various sizes, which can be convenient to carry while riding.
Tips for choosing the right torque setting:
- Check the user manual or manufacturer’s website for recommended torque specifications.
- Use a torque wrench to ensure bolts are tightened to the proper level.
- Be careful not to over-tighten, as this can damage the bike components.
Now, let’s go over the detailed process!
Step 1: Determine the Current Handlebar Height
Before raising the handlebars on your Specialized bike, it’s essential to determine the current handlebar height.
- Start by positioning the bike on a level surface, such as a work stand or a flat floor.
- Locate the stem on the front of the bike, which connects the handlebars to the steerer tube.
- Using a ruler or measuring tape, measure the distance from the center of the stem bolt to the top of the handlebars. This measurement will give you the current handlebar height.
- To ensure accuracy, it’s recommended that someone assist you in measuring while you hold the bike steady.
- Once you adjust, please write down the current handlebar height to compare it to the new height.
By determining the current handlebar height, you can ensure the new height is comfortable and appropriate for your riding style and body position.
Step 2: Loosen the Stem Bolts
When you have determined the current handlebar height, you can proceed to loosen the stem bolts.
- Identify the stem bolts on the bike. They are typically located on the top of the stem and can be identified by their hexagonal shape.
- Loosen the bolts by turning them counterclockwise using an appropriately sized Allen wrench or hex key. It’s important to loosen them evenly to avoid damaging the bike components.
- You only need to loosen the bolts enough to be able to make the necessary adjustments. Avoid removing the bolts completely, as this can make it challenging to realign the handlebars correctly.
- If the bolts are tight or difficult to loosen, you may need to apply some force using a mallet or rubber hammer. Be careful not to damage the bike components or the bolts themselves.
Step 3: Adjust the Stem Height
The next step is to adjust the stem height to the desired level.
- To adjust the stem height, you may need to gently tap the top of the stem with a rubber mallet to loosen it from the steerer tube. This will allow you to move the stem up or down as needed.
- Carefully adjust the stem height to the desired level. It’s important to ensure that the stem remains straight and centered with the front wheel.
- Remember that some stems have a maximum height limit, which may be marked on the stem itself or included in the manufacturer’s guidelines. Stay within this limit to avoid damaging the bike or compromising your safety while riding.
- Once you have adjusted the stem to the desired height, double-check that it is straight and secure by tightening the stem bolts evenly and to the recommended torque setting.
Step 4: Check the Alignment
Next, checking the alignment of the handlebars and stem with the front wheel is essential. Here’s how:
- Stand before the bike and look down at the front wheel to check that it is centered between the handlebars.
- Look at the handlebars from above to check their alignment with the front wheel. They should be straight and parallel to the front wheel.
- If necessary, make adjustments to ensure the handlebars are straight and aligned with the front wheel. This can be done by gently twisting the handlebars as needed.
- Once the handlebars are straight and aligned with the front wheel, tighten the stem bolts evenly and to the recommended torque setting.
Step 5: Tighten the Stem Bolts
Once you have adjusted the stem height and checked the alignment, it’s time to tighten the stem bolts.
- Reposition the stem over the steerer tube, ensuring it is straight and centered with the front wheel.
- Tighten the stem bolts gradually and evenly using an appropriately sized Allen or torque wrench. Avoid overtightening the bolts, as this can damage the bike components or cause them to fail while riding.
- Check the manufacturer’s guidelines or the bike’s manual for the recommended torque specification for the stem bolts. This will ensure the bolts are tightened to the correct level and prevent over-tightening.
- Tighten the stem bolts in a cross pattern, starting with one bolt and then moving diagonally to the opposite bolt. Repeat this process until all bolts are tight.
Step 6: Test the Handlebar Height
After completing the adjustments and tightening the stem bolts, it’s essential to test the handlebar height to ensure it is comfortable and safe. Here’s how:
- Take your specialized bike for a test ride to get a feel for the new handlebar height. Ride on a flat and safe surface to ensure that you can focus on the feel of the handlebars.
- Pay attention to how comfortable the new handlebar height is while riding. If you experience discomfort or strain on your back, shoulders, or arms, you may need to adjust the handlebar height further.
- If necessary, make any additional adjustments to the stem height or handlebar position before riding for an extended period.
That’s It! By testing the handlebar height, you can ensure that it is comfortable and safe to ride. Making any necessary adjustments can help prevent discomfort or strain on your body and ensure you can enjoy your ride to the fullest.
Do You Need to Add or Remove Headset Spacers?
Whether or not you need to add or remove headset spacers when raising handlebars on a specialized bike depends on the adjustment required to achieve the desired handlebar height.
If you only make a small adjustment to the stem height, you may not need to add or remove headset spacers. However, if you raise the stem significantly, you may need to add or remove spacers to ensure that the stem is properly supported and secure.
In general, headset spacers are used to adjust the height of the stem and handlebars, and they can be added or removed to fine-tune the adjustment. It’s important to ensure that the stem is securely attached to the steerer tube and that there is enough clearance between the stem and headset to prevent interference while riding.
How to raise handlebars on mountain bike
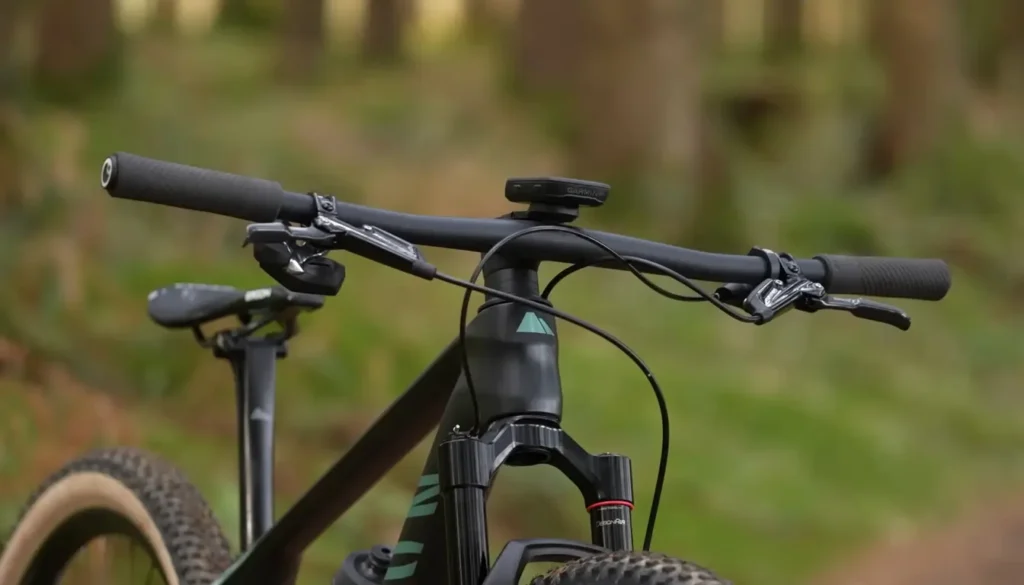
Adjusting the handlebars on your mountain bike is a simple process that can greatly improve your comfort and control while riding.
If you want to raise the handlebars on your mountain bike, follow these steps:
- Loosen the Stem Bolts: The stem connects the handlebars to the bike’s fork. Use an appropriate hex key or wrench to loosen the stem’s bolts. Usually, two bolts are on the stem’s side or top.
- Adjust the Height: Once the bolts are loosened, you can adjust the height of the handlebars by gently lifting them upward. Be careful not to raise them too high beyond the maximum limit marked on the stem.
- Align the Handlebars: Make sure the handlebars are aligned properly with the front wheel. They should be parallel to the ground and centered with the bike frame.
- Tighten the Stem Bolts: Once you’ve achieved the desired height and alignment, tighten the stem bolts securely. Alternate between the bolts while tightening to ensure even pressure.
- Test the Adjustment: Before riding, test the handlebar adjustment by applying pressure and turning the handlebars from side to side. They should feel stable and secure.
- Fine-tune if Necessary: If the handlebars still don’t feel comfortable, repeat the process to make minor adjustments. Small changes can make a big difference in your riding experience.
By following these steps, you can easily raise the handlebars on your mountain bike to achieve a more comfortable and ergonomic riding position. Remember always to check the tightness of bolts and test the adjustments before hitting the trails.
Ways to Raise the Handlebars if There Are No Spacers Above the Stem
Sometimes, you may want to raise the handlebars on your specialized bike, but there are no spacers above the stem; there are a few options you can consider:
Replace the Stem:
You can replace your current stem with one with a higher rise. A higher-rise stem will position the handlebars higher, providing the desired height adjustment. When selecting a new stem, ensure it’s compatible with your bike’s steerer tube and handlebar clamp diameter.
Use an Angled Stem:
An angled stem has a slight bend that can be used to adjust the handlebar height. Angled stems are available in various angles, typically 6 to 25 degrees. The greater the angle, the greater the height adjustment.
Add a Steerer Tube Extender:
A steerer tube extender is a device that attaches to the top of the steerer tube, providing extra length and allowing the stem to be positioned higher. They are available in different lengths and come with a new top cap and bolt to secure the assembly.
How Can You Raise the Handlebars on a Specialized Bike?
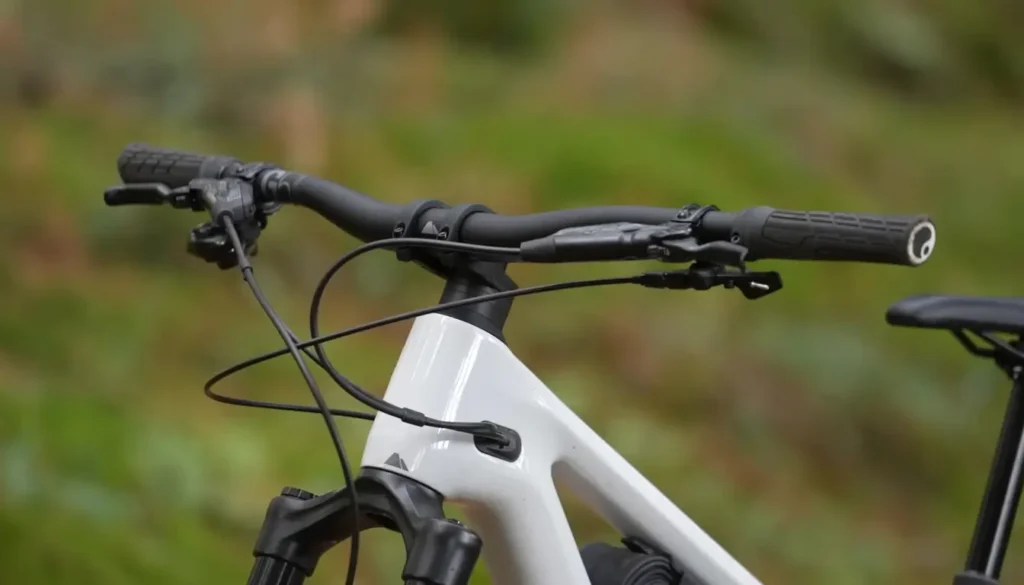
To raise the handlebars on a Specialized bike, start by locating the stem bolts on the stem connecting the handlebars to the bike’s fork. Then, loosen these bolts using an appropriate tool, such as a hex key or wrench. Once loosened, adjust the height of the handlebars to your preferred position. Ensure the handlebars are aligned parallel to the ground and centered with the bike frame. After adjusting, tighten the stem bolts securely, alternating between bolts to distribute pressure evenly. Finally, the handlebar adjustment is tested by applying pressure and turning the handlebars from side to side. Make any necessary fine-tuning adjustments for comfort before riding.
Important Tips for How to Raise Handlebars on Specialized Bike
When raising the handlebars on a Specialized bike, there are several important tips to keep in mind:
- Safety First: Ensure the bike is stable and secure before adjusting. Use a bike stand or have someone hold it to prevent it from tipping over.
- Know Your Limits: Check the maximum height limit marked on the stem to avoid raising the handlebars beyond what is safe or recommended for your bike.
- Proper Tools: Use the correct tools, such as a hex key or wrench, to loosen and tighten the stem bolts. Using the wrong tools can damage or strip the bolts, making adjustments difficult.
- Alignment: Pay attention to the alignment of the handlebars with the front wheel and bike frame. They should be parallel to the ground and centered to ensure stability and comfort while riding.
- Even Tightening: When tightening the stem bolts, alternate between bolts to distribute pressure evenly. This helps prevent uneven tension, which can affect the stability of the handlebars.
- Test Before Riding: After making adjustments, test the handlebar height and alignment by applying pressure and turning the handlebars from side to side. Ensure they feel stable and secure before riding.
- Fine-tuning: Make any necessary fine-tuning adjustments for comfort. Small changes can make a big difference in your riding experience, so take the time to find the right height and position.
By following these important tips, you can safely and effectively raise the handlebars on your Specialized bike to achieve a more comfortable and ergonomic riding position.
Frequently Asked Questions
Do I Need Special Tools to Raise the Handlebars on My Specialized Bike?
Yes, you will need a few tools to adjust the height of your handlebars, including an Allen wrench or hex key and a torque wrench. Choosing the right size wrench and torque setting is important to avoid damaging the stem or other parts of the bike.
Can I Raise the Handlebars Without Adding or Removing Spacers?
Yes, if there are no spacers above the stem, there are other ways to adjust the height of your handlebars. One option is to flip the stem over, raising the handlebars slightly. Another option is to replace the stem with a higher rise.
Can I Raise the Handlebars on My Specialized Road Bike?
Yes, you can adjust the height of the handlebars on your Specialized road bike, but it’s important to note that raising the handlebars too high can affect the bike’s handling and stability at high speeds. It’s recommended to consult with a professional bike fitter to find the right handlebar height for your riding style and preferences.
How Do I Know if I Need to Add or Remove Headset Spacers?
If there are no spacers above the stem, you may need to add or remove spacers to achieve the desired handlebar height. It’s recommended to start by removing a spacer or two and testing the height before adding additional spacers.
Can I Adjust the Handlebar Height on a Bike With a Threadless Headset?
Yes, you can adjust the handlebar height on a bike with a threadless headset by adding or removing spacers or replacing the stem. However, it’s recommended to seek assistance from a professional bike mechanic to become more familiar with the process or tools needed for the adjustment.
How to raise the handlebars on a mountain bike?
To raise the handlebars on a mountain bike, loosen the stem bolts, adjust the height to your preference, and then tighten the bolts securely.
How do you raise the handlebars on a road bike?
To elevate the handlebars on a road bike for a more comfortable ride, start by loosening the stem bolts with the appropriate tool. Then, adjust the stem height to your desired level before securely tightening the bolts again. This simple tweak can enhance your biking experience by providing better posture and reduced strain on your back and shoulders.
Can I raise the handlebars on my Trek bike?
Certainly! Elevating the handlebars on your Trek bike is feasible. Begin by locating the stem bolts on the stem connecting the handlebars to the bike’s fork. After loosening these bolts, adjust the handlebar’s height to your preference. Ensure they are aligned parallel to the ground and centered with the bike frame. Once adjusted, securely tighten the stem bolts. This simple adjustment can significantly enhance your riding comfort and control on your Trek bike.
How do I make my bike handlebars higher?
To increase the height of your bike handlebars, consider adding a stem extender or riser handlebars. A stem extender attaches to your existing stem, allowing additional height adjustment. Riser handlebars are higher than traditional handlebars, providing a more upright riding position. Both options offer a unique solution to elevate your handlebars and enhance biking comfort.
Finally, Need to Adjust the Quill Stem’s Height? Here’s How?

Adjusting the height of a quill stem on your Specialized bike requires a few steps:
- Loosen the bolt on the quill stem: Locate the bolt at the top and use a wrench or Allen key to loosen it. Do not remove the bolt entirely.
- Adjust the height: Pull the handlebars up or down to adjust the stem height to your desired position. Be careful not to exceed the maximum height limit marked on the stem.
- Tighten the bolt: Once the stem is in the desired position, tighten the bolt back up with the wrench or Allen key. Ensure it’s tight enough to hold the stem in place but not so tight that it damages the quill or stem.
- Check alignment: Ensure the stem and handlebars are aligned with the front wheel. You can do this by standing before the bike and checking if the handlebars are straight and parallel to the front wheel.
- Test the adjustment: Take the bike for a test ride to see if the new handlebar height is comfortable and safe. If you need help, you can make further adjustments until you find the right height.
Note: When your quill stem is not adjustable, you may need to replace it with a different stem to achieve your desired handlebar height.

I am Ryan Ford, a mountain biking enthusiast who loves to explore the outdoors. I also like to go on adventures with friends and anything else that involves being outside. I love my bike because it gets me out of the house and gives me an opportunity to enjoy nature.